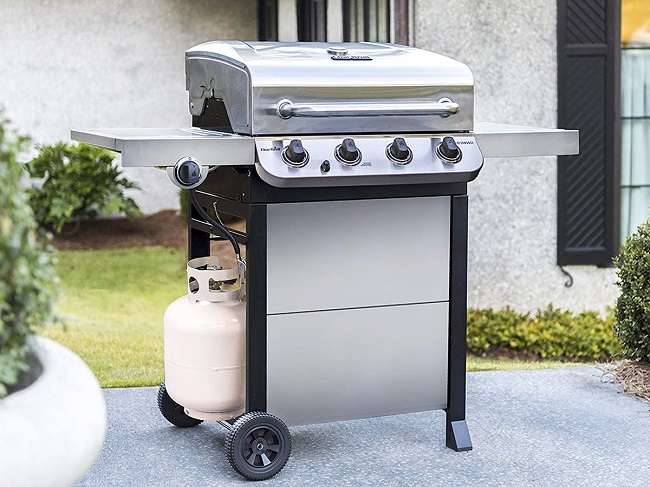
In the contemporary time, modern grills come with a dual fuel system, where propane & natural gas works as the power source. If you own such a grill, you may ask how to convert a propane grill to natural gas? In the following content, I’ll cover a comprehensive way of converting a propane grill to natural gas.
A typical incident happens to almost every outdoor griller that their propane tank gets out of fuel, mostly when everyone comes for an on-the-spot BBQ program. If you have a natural gas grill line attachment inside your house, DIY changing equipment, and the proper guidance, you can convert without hassle.
Most gas-fueled BBQ grills run on Liquid Propane or LPG gas, it is a slightly expensive fuel source, and you have to refill or replace the tank when finished. On the other hand, natural gas is a widely available fuel source, and it is cheaper than LPG gas. Besides, you don’t have to go for tanks when cooking with natural gas grill.
It is best to switch to natural gas instead of propane if you have a municipal gas supply connection which reduces annual costs by hundreds of dollars. Without further ado, Let’s dive into the step-by-step procedure of propane to natural gas conversion for your outdoor grill.
Takeaways Before You Go For Propane To Natural Gas Conversion
Before converting propane to natural gas for your outdoor gas grill, you should consider some precautions. Since converting is not all you need if your grill is incompatible or cannot run with natural gas. Here are the following takeaways-
- Before getting started, you need to make sure that you have a mains gas connection or arrange one.
- Since all grills are not convertible, you need to ensure that your grill is convertible to natural gas.
- If your grill is convertible, you should start with an administrator kit from the maker of your grill, and we recommend it highly.
- All the steps are pretty easy to follow, and here, we have described the whole methodology in detailed steps.
- If you are not adequately self-reliant, many workers and gas organizations can do the job of converting for you.
Getting Started With Safety Concerns First
Almost every Do It Yourself specialist appreciates that the tasks affecting flammable pieces of stuff need extra caution. Before considering converting a propane grill on your own, make sure you acknowledge all the risk factors.
However, with the help of conversion kits, you can effortlessly perform the conversion on your own at home securely, even if you are still hesitant about whether you can regenerate your outdoor grill even after completing the steps accurately. That’s why it would help if you call a nearby gas grill installer for the additional assistance of experts hands.
Each conversion tool and kit may differ from one another slightly. Therefore, you should evermore belong to these for precise specifications. Below, we have enlisted the overall actions you may face while shifting the thing yourself.
How To Converting A Propane Grill To Natural Gas

All available grills cannot gain the leap of propane to natural gas. You should have a closer look at the inner entrance of your outdoor grill to check its dual-fuel ability. If you doubt, don’t hesitate to call the manufacturer undeviatingly with inquiries you have in mind.
1. Buy The Required Conversion Tools
Each outdoor grill demands individual conversion tools for safer conversion. You can get these tools from an online store, a local grilling hardware shop, or producers. Make sure you go for the compatible kit by observing your grill’s model and brand.
Here are the basic kits you need for conversion-
- a typical gas hose regulator gas spurts
- a series of small wrenches or hex openers.
All the tools mentioned above will cost about 50 dollars to 100 dollars on average.
It would help if you never fastened up your gas pipe to your grill before converting it as a preventive tip. Since these are two different fuel types, they also burn in a particular way. Besides, they can also grill your steak in the wrong way and cause hazardous incidents.
2. Check If you have Mains supply
If you live in an area where the whole residence is covered by mains gas supply, expanding the existing collection into your grill is comparatively simple. Notwithstanding, you must arrange a professional company if you do not have a municipal gas supply. The company will critique whether they can implement a link pipe into your premises.
Hiring a pro surveying company might seem pricey, and the servicing may not last long. Completing a surveying process may appear nearly impossible if you live in a remote area far away from the municipality. At this stage, your costing may increase depending on your area distance from the supply centerline.
An outway to match out is that you can go online to find out which area nearby gas suppliers cover. Alternatively, you can easily manage a gas supply at a cheaper cost if you know that your nearby neighbor has a supply line already.
3. Contact Your Gas Provider
Search and find a quality gas line expert or a plumber who can set a gas line from your house to your outdoor grill. And this procedure may cost about 20 dollars to 25 dollars per linear foot on average. Inform them that you are making the task of converting your propane grill to natural gas since they may have a few guidelines for perfect switching.
4. Switch Off Your Gas Line

Before sending the plumber on the primary working pathway, ask him about obtaining your gas shut-off pipe inside your home. You may have to switch off the gas pipe ere connecting with the grill. Not to mention, set it behind the track when you are all to go for cooking. If your natural gas line valve is nearby a roadside, tell the professional to put it in a suitable place for your usage.
5. Prepare Your Grill
If the system stops flowing or leaking gas, close the older system. Ensure that the grill controls are placed to the neutral or switched off position and the liquid propane gas tank is not connected. Be assured to switch off/ close the propane tank valve also.
6. Remove The Top Layers & Burners
Open the center of your grill slowly, and it’s time to remove some parts. They are as follows-
- Cooking grates
- Heating racks
- Flare tamers
After removing the specific parts, the burners will be visible now. Typically most grills come with two to six burners, depending on your grill’s size. The burners appear as expanded metal buckets with a range of openings crosswise the head to toe for the fire to leave.
For removing the burners, you have to move out the knot pins drilled on both sides of every burner. You can do the removing task with the aid of bare hands alone. Displace all holdover pipes attaching the burners. Next, cautiously remove the burners or stoves themselves. Before doing so, we suggest you check your grill’s manual since grills vary from part to part.
7. Replace Orifices
There are some small gas jets hammered into your grill, and people call them orifices or spuds. The main task is to transmit gas within the hose and the stoves.
To reach the grill, you need to use hex tools in this section and carefully unscrew all the tiny alloy pieces. If you plan to shift your grill somewhat later, you have to keep them, but don’t use them for natural gas.
8. Switch Off Your Bezels
At first, you should displace the front knobs of your grill. The bezels are easily pullable directly close to you, and now you have to observe them again. Usually, bezels function as a regulator for the stream of LP gas.
It is the thing that enables you to slow cook your vegetables or achieve a sear on your burger. You should unscrew the older bezels of the LP gas grill and replace them with the natural gas line elements. Don’t forget to align the queues on point before closing the nuts.
9. Re-Install Burners
You should capture some photos before you displace the grill, and those photos may come in handy for re-installing the grill. Work as you reverse the whole process, set the burners, hitch pins, and carryover bars back in the exact location.
Always keep an eye out that the before and after the appearance of your grill is the same. Otherwise, your grill may not heat or function properly as before.
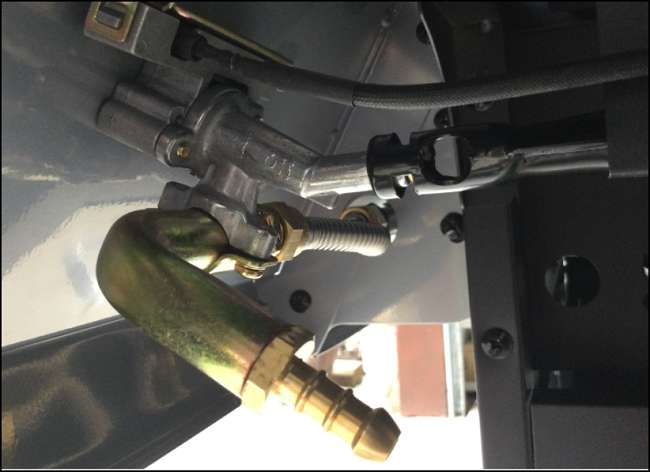
10. Switch Your Hose
Apply a wrench to unfasten the propane switch line from the diverse connection. This pipe is typically placed off the rear of the rack beneath the side rack. You can preserve this beside your propane openings if you somehow decide to convert back. Always locate the original hose that arrived with your conversion knapsack to the exact place.
Final Verdict
After setting the hose and other remaining parts in their previous place, you are ready to fire up your gas line and jump for grilling. If all the steps and procedures seem like a sweat-breaking task for you, go for hiring an expert. Depending on your grill size and prevailing circumstances, they usually charge about 150 to 300 dollars.